


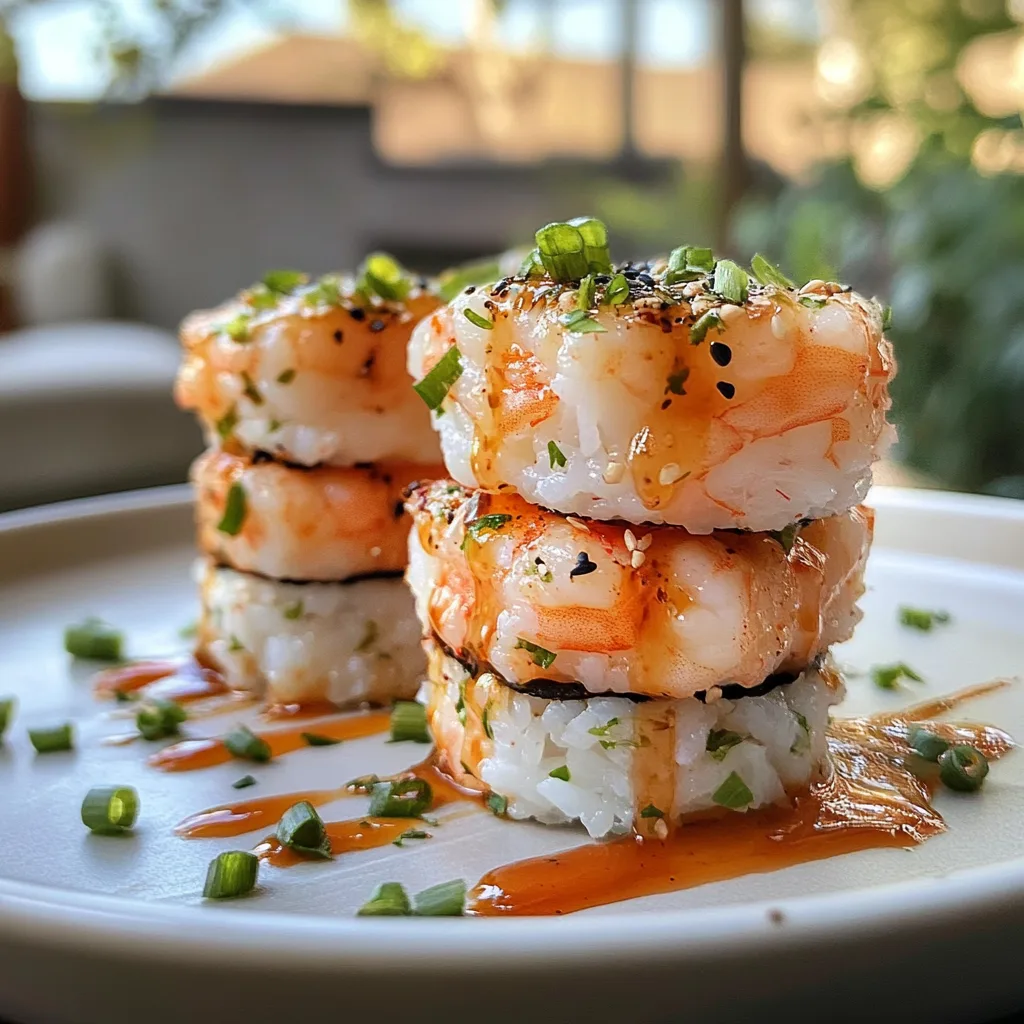
Imagine sinking your teeth into a beautifully crafted shrimp sushi stack, where succulent shrimp meet vibrant layers of fresh vegetables and perfectly seasoned rice, all drizzled with a tantalizing sauce that dances on your taste buds. Each bite bursts with flavor, combining the sweetness of the shrimp and the crunch of crisp veggies, creating a mouthwatering experience that’s as visually stunning as it is delicious.
This dish holds a special place in my heart, reminding me of sun-soaked summer picnics where friends gathered around to share laughter and good food. Perfect for any occasion—from casual get-togethers to special celebrations—these shrimp sushi stacks promise to elevate your dining experience and leave everyone craving more. Get ready to impress with this incredible flavor journey!
Why Is Shrimp Sushi Stacks So Irresistibly Good?
Deliciously layered with fresh shrimp, vibrant veggies, and perfectly seasoned sushi rice, these stacks are a feast for the eyes and the palate. Quick to prepare, you can whip them up in just 30 minutes, making them an ideal choice for busy weeknights or last-minute gatherings. Versatile and customizable, feel free to swap in your favorite ingredients or sauces! Crowd-pleasing appeal ensures that everyone will be coming back for seconds. Finally, the tangy sauce adds a zesty kick that ties all the flavors together beautifully!
Shrimp Sushi Stacks Ingredients
For the Sushi Rice
- 1 cup sushi rice (rinsed) – Rinsing helps remove excess starch, resulting in a perfect sticky texture for your Shrimp Sushi Stacks.
- 1 1/4 water – This is the ideal amount to cook the sushi rice to fluffy perfection.
- 2 tablespoons rice vinegar – Adds a tangy flavor that balances the richness of the shrimp and vegetables.
- 1 tablespoon sugar – Enhances the overall flavor of the rice, giving it a subtle sweetness.
- 1 teaspoon salt – A pinch of salt brings out all the delicious flavors in your sushi rice.
For the Shrimp Layer
- 1 pound shrimp (peeled and deveined) – Fresh shrimp adds a delightful protein layer to your sushi stacks, making them satisfying and flavorful.
- 2 tablespoons soy sauce – Provides umami depth, enhancing the natural taste of the shrimp beautifully.
- 1 tablespoon sesame oil – This adds a nutty aroma and rich flavor to the shrimp layer.
- 1 teaspoon ginger (grated) – Fresh ginger gives a zesty kick that complements the seafood perfectly.
- 1 clove garlic (minced) – Garlic adds warmth and depth to the shrimp’s flavor profile.
For the Vegetable Layer
- 1 medium cucumber (sliced thin) – Crisp cucumber adds refreshing crunch and balance to each bite of sushi stack.
- 1 medium avocado (sliced) – Creamy avocado creates a velvety texture that pairs wonderfully with other ingredients.
- 1 medium carrot (shredded) – Shredded carrot provides a sweet flavor and vibrant color for visual appeal.
- 2 tablespoons scallions (chopped) – Scallions add a mild onion flavor and freshness to brighten up your stacks.
For the Sauce
- 3 tablespoons mayonnaise – Creamy mayo serves as a rich base for your dipping sauce, enhancing each bite’s indulgence.
- 1 tablespoon sriracha (adjust to taste) – Sriracha brings heat; adjust according to your spice preference for a delightful kick!
- 1 teaspoon lime juice – A splash of lime juice brightens up the sauce with zesty freshness, balancing out richness beautifully.
How to Make Shrimp Sushi Stacks
1. Cook sushi rice: Rinse 1 cup of sushi rice until the water runs clear, then cook it in a rice cooker with 1 1/4 cups water according to package instructions. This will yield fluffy, perfect sushi rice!
2. Season the rice: Once cooked, mix together 2 tablespoons of rice vinegar, 1 tablespoon of sugar, and 1 teaspoon of salt in a bowl until dissolved. Gently fold this mixture into the warm rice and let it cool at room temperature.
3. Heat the skillet: In a skillet over medium heat, add 1 tablespoon of sesame oil. Once hot, toss in 1 clove of minced garlic and 1 teaspoon of grated ginger. Sauté for about 1 minute until fragrant.
4. Cook the shrimp: Add in 1 pound of peeled and deveined shrimp along with 2 tablespoons of soy sauce. Cook until the shrimp turn pink and opaque, roughly 3-4 minutes. Remove from heat and set aside.
5. Layer ingredients: Using a sushi mat, start layering your cooled sushi rice first, followed by the shrimp mixture, thinly sliced cucumber, avocado slices, shredded carrot, and chopped scallions for that vibrant crunch.
6. Form stacks: Press down gently on the layers with the sushi mat to create a firm stack. Carefully lift the mat to reveal your beautifully formed sushi stacks; repeat this process for any remaining ingredients.
7. Prepare the sauce: In a small bowl, combine 3 tablespoons of mayonnaise, 1 tablespoon of sriracha (feel free to adjust based on your spice preference), and 1 teaspoon of lime juice. Mix until smooth and creamy.
8. Serve your creation: Slice the sushi stacks into rounds with a sharp knife and arrange them on a platter. Serve with your tangy sauce on the side for dipping!
Optional: Drizzle with extra sriracha for an added kick!
Exact quantities are listed in the recipe card below.
Expert Tips
- Perfectly Cooked Rice: Use a rice cooker for precise cooking. If using stovetop, ensure the water is absorbed fully to avoid mushy rice.
- Chill the Rice: Allow the sushi rice to cool before assembling. This helps it hold together better in your shrimp sushi stacks.
- Fresh Shrimp: Always choose fresh or properly thawed shrimp for a tender texture. Under-cooked shrimp can be rubbery and unappetizing.
- Layer with Care: When stacking, apply gentle pressure to avoid squishing the ingredients, ensuring each layer stays distinct in your shrimp sushi stacks.
- Sauce Balance: Adjust sriracha to taste; too much can overpower the delicate flavors of the shrimp and vegetables.
How to Store and Freeze Shrimp Sushi Stacks
- Fridge: Store leftover Shrimp Sushi Stacks in an airtight container for up to 2 days to maintain freshness and flavor.
- Freezer: While not recommended for optimal texture, you can freeze the shrimp layer separately for up to 1 month. Thaw in the fridge before assembling.
- Refrigerating Ingredients: Keep individual components like sliced avocado and cucumber wrapped tightly to prevent browning; use within 1 day for best quality.
- Serving Freshness: For the best taste, assemble your Shrimp Sushi Stacks just before serving, especially after refrigerating the sauce.
Shrimp Sushi Stacks Variations
Feel free to explore these delightful twists on the classic recipe, adding your favorite flavors and textures!
- Quinoa Base: Substitute sushi rice with cooked quinoa for a nutty flavor and added protein. Quinoa not only adds a different texture but also makes this dish gluten-free.
- Spicy Shrimp: Toss shrimp in chili garlic sauce instead of soy sauce for a fiery kick. This variation is perfect for those who crave a bit more heat in every bite.
- Avocado Swap: Replace the avocado with cream cheese for a richer, creamier layer. The smoothness of cream cheese pairs beautifully with the crunch of fresh veggies.
- Pickled Veggies: Use pickled daikon or radish slices instead of fresh cucumber for a zesty tang. Pickled vegetables can elevate the flavor profile and add an exciting contrast.
- Tropical Twist: Add diced mango to the vegetable layer for a sweet, tropical touch. The juicy mango will perfectly balance the savory elements of the stacks.
- Sesame Crunch: Incorporate toasted sesame seeds into the rice for added texture and flavor. These little seeds will give each stack an extra crunch and nutty aroma.
- Herb Infusion: Mix in chopped cilantro or mint into the vegetable layer for an aromatic lift. Fresh herbs can brighten up the dish, making each bite refreshing and vibrant.
Make Ahead Options
These Shrimp Sushi Stacks are a fantastic choice for meal prep, allowing you to enjoy fresh flavors throughout the week. You can prepare the sushi rice up to 24 hours in advance; simply cook 1 cup of sushi rice in a rice cooker with 1 1/4 cups of water and, once cooked, mix in 2 tablespoons of rice vinegar, 1 tablespoon of sugar, and 1 teaspoon of salt. For the shrimp, you can sauté 1 pound of peeled and deveined shrimp with 2 tablespoons of soy sauce, 1 tablespoon of sesame oil, and aromatics like 1 teaspoon grated ginger and 1 minced clove of garlic a day ahead as well. The vegetables—thinly sliced cucumber, avocado, shredded carrot, and chopped scallions—can also be prepped a few hours in advance but should be stored separately to maintain their freshness. Lastly, the sauce made from combining 3 tablespoons of mayonnaise, 1 tablespoon of sriracha (adjust to taste), and 1 teaspoon of lime juice can be mixed up to three days ahead. When you’re ready to serve, simply assemble your stacks using the prepped ingredients and slice them into rounds for an effortless meal that keeps quality at its best!
Shrimp Sushi Stacks Recipe FAQs
What type of rice is best for sushi stacks?
For the best results, use sushi rice, which is short-grain and has a sticky texture when cooked. This helps the layers hold together nicely. Rinse the rice thoroughly before cooking to remove excess starch, ensuring a perfect, fluffy consistency.
How should I store leftover shrimp sushi stacks?
If you have leftovers, store them in an airtight container in the refrigerator for up to 24 hours. However, keep in mind that the freshness of the ingredients may diminish. To maintain flavor and texture, it’s best to assemble only what you plan to eat immediately.
Can I freeze shrimp sushi stacks?
Freezing is not recommended for assembled shrimp sushi stacks due to the fresh ingredients like avocado and cucumber, which do not thaw well. However, you can freeze cooked shrimp separately and use them later when you’re ready to assemble a fresh batch!
What if my sushi rice is too sticky?
If your sushi rice turns out too sticky or mushy, it may be due to using too much water or overcooking it. Next time, try using slightly less water (about 1 cup for 1 cup of rice) or following package instructions closely. Letting the rice cool completely before assembling will also help achieve better texture.
How many servings does this recipe yield?
This recipe yields about 4 servings, each containing approximately 250 calories. It’s perfect for sharing with family or friends at gatherings! If you’re looking to serve more people, consider doubling the ingredients for an extra batch.
What are some dietary considerations for this recipe?
The shrimp sushi stacks can be easily adapted for various dietary needs. For a gluten-free option, use gluten-free soy sauce or tamari instead of regular soy sauce. You can also replace shrimp with tofu or other protein sources for a vegetarian version while maintaining delicious flavors!
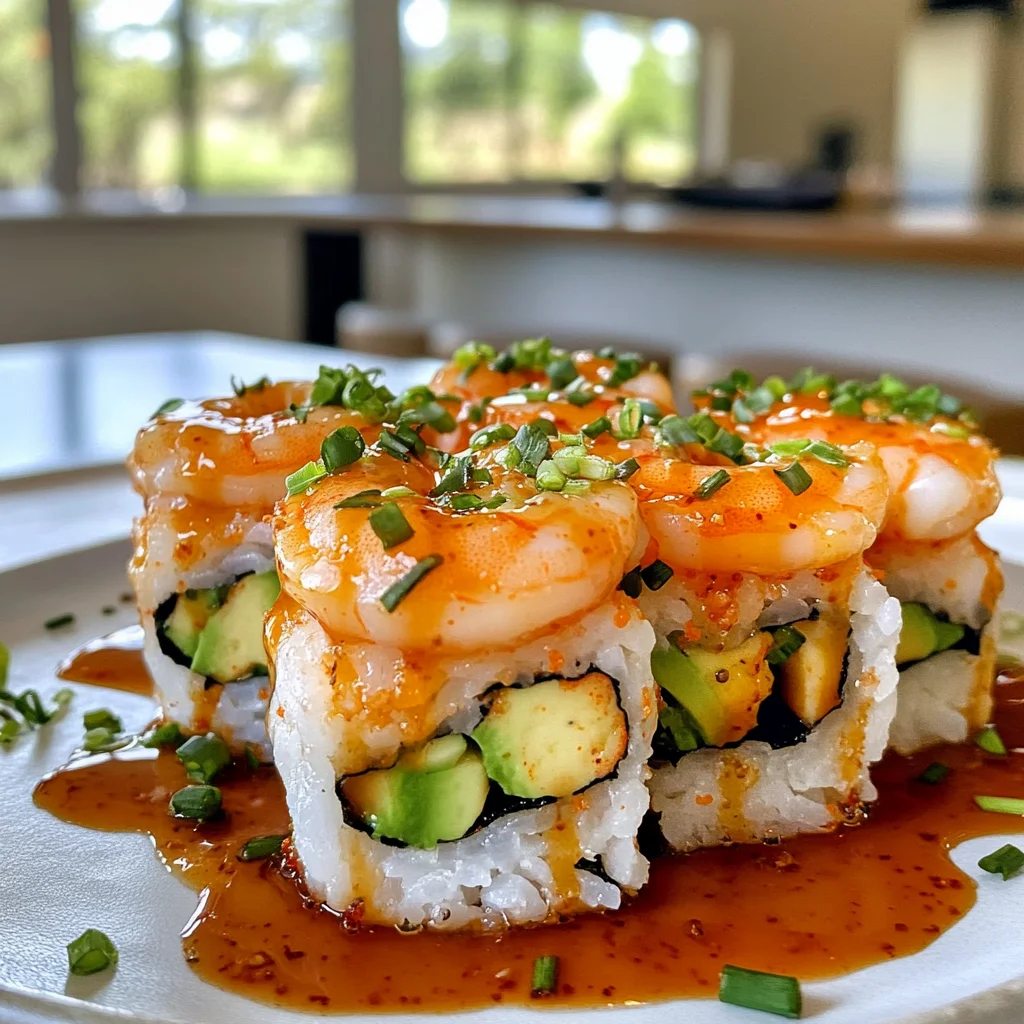
Shrimp Sushi Stacks
Ingredients
Method
- Cook sushi rice in a rice cooker with water according to package instructions.
- Once cooked, mix rice vinegar, sugar, and salt in a bowl until dissolved, then fold into the rice. Let cool.
- In a skillet, heat sesame oil over medium heat. Add garlic and ginger, sauté for 1 minute.
- Add shrimp and soy sauce, cook until shrimp are pink and opaque, about 3-4 minutes. Remove from heat.
- Using a sushi mat, layer sushi rice, followed by shrimp, cucumber, avocado, carrot, and scallions.
- Press down gently and carefully lift the sushi mat to form a stack. Repeat for remaining ingredients.
- In a small bowl, mix mayonnaise, sriracha, and lime juice until smooth.
- Slice the sushi stacks into rounds and serve with the sauce on the side.
Leave a Comment