

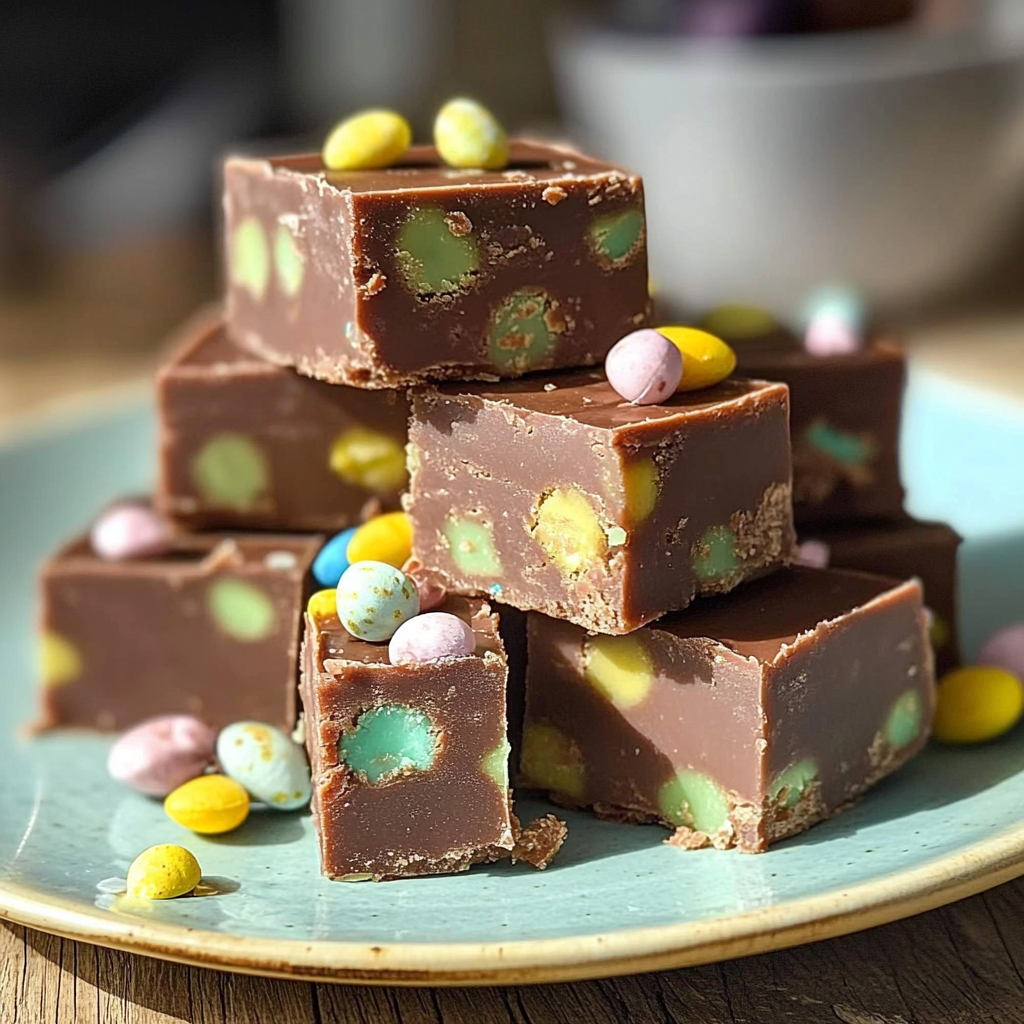
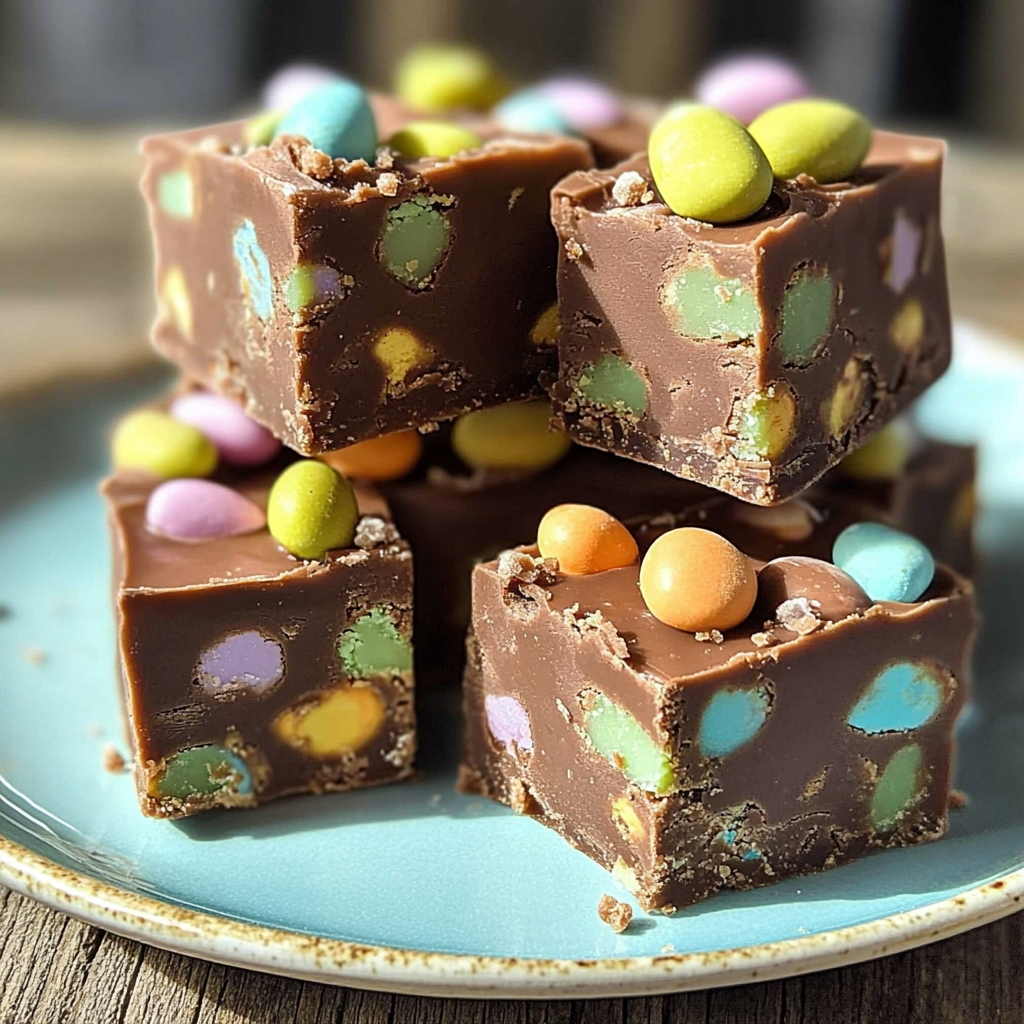
No-Bake Easter Fudge is the ultimate treat for your spring celebrations. This simple yet delicious recipe combines rich chocolate with festive colors, making it a perfect choice for family gatherings or holiday parties. With minimal effort involved, you can whip up this delightful dessert in no time. Imagine creamy chocolate melting in your mouth alongside crunchy toppings that add a satisfying texture. This treat not only satisfies your sweet tooth but also brings joy to everyone around the table. Plus, it’s a fantastic option if you’re short on time but still want to impress your guests with a homemade delight. The best part? You don’t even need an oven to create this scrumptious treat! Read on to discover why you’ll love this No-Bake Easter Fudge and how easy it is to prepare.
Why You’ll Love This No-Bake Easter Fudge
- Quick and Easy: Minimal prep time and straightforward steps make this recipe stress-free, even for novice cooks
- Flavorful and Versatile: Enjoy outstanding flavor with ingredients you can easily customize by adding your favorites or adjusting spices
- Perfect for Any Occasion: Ideal for casual gatherings, holiday celebrations, or weeknight dinners

Craving more delicious ideas? Try this next!
Ingredients for No-Bake Easter Fudge
Here’s what you’ll need to make this delicious dish:
- Chocolate Chips: Use semi-sweet chocolate chips for a balanced sweetness; feel free to mix in milk or dark chocolate according to your taste.
- Sweetened Condensed Milk: This ingredient provides creaminess and helps the fudge set perfectly without baking.
- Butter: Opt for unsalted butter to control the saltiness of the fudge while enhancing its richness.
- Vanilla Extract: Pure vanilla extract adds depth of flavor; avoid imitation extracts for the best results.
- Sprinkles or Toppings: Choose colorful sprinkles or crushed candies to give your fudge a festive look.
The full ingredients list, including measurements, is provided in the recipe card directly below.
How to Make No-Bake Easter Fudge
Follow these simple steps to prepare this delicious dish:
Step 1: Prepare Your Dish
Start by lining an 8×8-inch baking dish with parchment paper. This will make removing the fudge easier once it’s set.
Step 2: Melt Ingredients
In a medium saucepan over low heat, combine chocolate chips, sweetened condensed milk, and butter. Stir continuously until everything melts together smoothly.
Step 3: Add Flavor
Once melted, remove the saucepan from heat. Stir in vanilla extract until fully incorporated into the mixture.
Step 4: Pour Into Dish
Carefully pour the fudge mixture into the prepared baking dish. Spread it evenly using a spatula to ensure uniform thickness.
Step 5: Add Toppings
Sprinkle colorful toppings over the surface of the fudge while it’s still warm. Lightly press them down into the mixture so they adhere well.
Step 6: Chill Until Set
Refrigerate the fudge for at least two hours or until firm. Once set, lift it out of the dish using the parchment paper and cut into squares.
Transfer to plates and enjoy this delightful No-Bake Easter Fudge with family and friends!
Looking for something similar? Check this out!
Tips and Tricks
Here are some helpful tips to ensure the best results for your dish:
- Use Quality Chocolate: High-quality chocolate chips yield richer flavors; opt for brands known for their taste.
- Chill Thoroughly: Ensure you allow enough time in the refrigerator for optimal firmness before slicing.
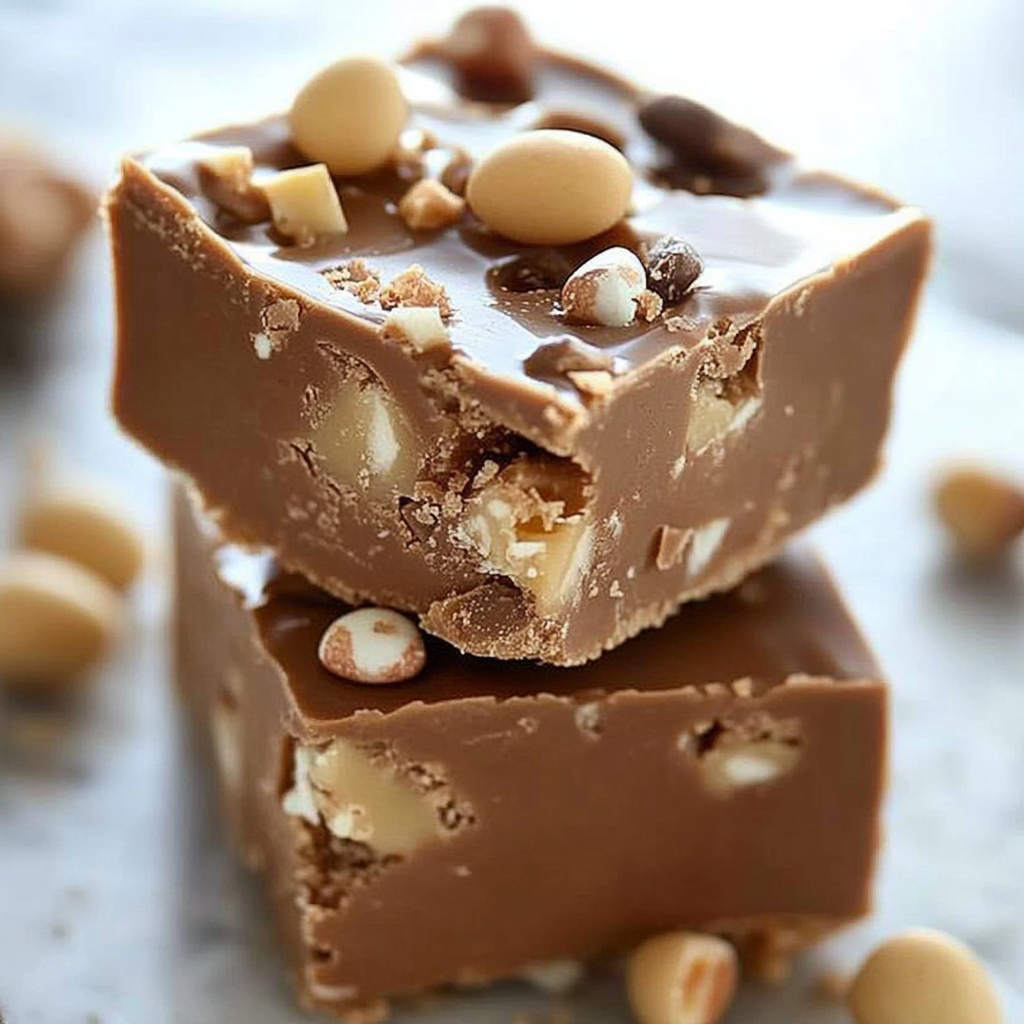
- Add Variety: Experiment with different toppings like nuts or dried fruits to create unique flavor combinations.
How to Serve No-Bake Easter Fudge
This No-Bake Easter Fudge is versatile and pairs wonderfully with:
- Fresh Fruit: The sweetness of the fudge complements the tartness of berries and citrus fruits.
- Ice Cream: A scoop of vanilla or chocolate ice cream enhances the rich flavors and provides a creamy contrast.
- Coffee or Tea: A warm beverage balances the sweetness, making it an ideal pairing for an afternoon treat.
Feel free to pair it with your favorite sides for a personalized meal!
If you love this, you’ll enjoy this recipe too!
Make Ahead and Storage
- Make Ahead: You can prepare No-Bake Easter Fudge a day in advance. Simply mix your ingredients, pour the mixture into a lined pan, and refrigerate for at least two hours until set. This allows the flavors to meld beautifully.
- Storing: Keep any leftover fudge in an airtight container in the refrigerator. It will stay fresh for up to one week. For longer storage, consider freezing it in a freezer-safe container for up to three months.
- Reheating: If you prefer your fudge slightly softened, let it sit at room temperature for about 15 minutes before serving. Avoid reheating in the microwave, as it may alter the texture and flavor.
Suggestions for No-Bake Easter Fudge
Use Quality Ingredients
Choosing the right ingredients is crucial for creating delicious No-Bake Easter Fudge. Use high-quality chocolate, fresh butter, and pure vanilla extract. Cheaper alternatives might save you money but can compromise flavor and texture. Always check the expiration dates on your ingredients, especially the chocolate and cream. Freshness ensures a rich taste and creamy consistency in your fudge. Invest time in selecting the best ingredients, as they will elevate your dessert from average to exceptional.
Measure Accurately
Accurate measurements can make or break your No-Bake Easter Fudge recipe. Use precise tools like a kitchen scale for chocolate and measuring cups for liquids. Improper ratios can lead to a fudge that is either too hard or too soft. For instance, too much cream may cause the fudge not to set properly, while too little can result in a rocky texture. Follow the recipe closely and double-check measurements to ensure that you achieve that perfect balance of flavors and textures.
Chill Time is Essential
Don’t rush the chilling process when making No-Bake Easter Fudge. After mixing all your ingredients, allow your fudge to chill in the refrigerator for at least two hours before cutting it into pieces. This step is essential for allowing the fudge to firm up properly, ensuring it holds its shape when sliced. Skipping this step may lead to a gooey mess rather than firm fudge squares. Patience pays off here; letting it chill properly will significantly enhance your experience.
Avoid Overmixing
When preparing your No-Bake Easter Fudge, be careful not to overmix your ingredients once they are combined. Stirring too vigorously can introduce excess air into the mixture, causing an undesirable texture that lacks smoothness. Instead, gently fold in your chocolate and other components until just combined. This ensures a dense yet creamy fudge that melts beautifully in your mouth. The key is to mix enough to blend flavors without compromising texture.
Need more inspiration? This recipe is a must-try!
FAQs
What is No-Bake Easter Fudge made of?
No-Bake Easter Fudge typically consists of simple ingredients such as chocolate chips, sweetened condensed milk, butter, and vanilla extract. You can also add festive elements like sprinkles or mini eggs to enhance its appeal for Easter celebrations. The beauty of this recipe lies in its versatility; feel free to incorporate various mix-ins like nuts or dried fruits according to personal preference or seasonal themes.
How long does No-Bake Easter Fudge last?
Properly stored No-Bake Easter Fudge can last up to two weeks when kept in an airtight container at room temperature or in the refrigerator for optimal freshness. If you want it to last even longer, consider freezing it; wrapped well, it can stay good for up to three months! Just remember to let it thaw in the refrigerator before serving for the best texture and flavor experience.
Can I customize my No-Bake Easter Fudge?
Absolutely! One of the best aspects of making No-Bake Easter Fudge is its adaptability. You can easily change flavors by using different types of chocolate—milk, dark, or white—or by incorporating various mix-ins like nuts, caramel swirls, or flavored extracts such as almond or peppermint. Feel free to get creative with toppings as well; mini marshmallows or candy pieces are fun additions that make your fudge even more festive!
Is No-Bake Easter Fudge suitable for special diets?
Yes! You can modify No-Bake Easter Fudge recipes to accommodate various dietary needs. For instance, using gluten-free chocolate and sweetened condensed milk allows those with gluten sensitivities to enjoy this treat. Additionally, vegan versions can be made by substituting regular butter with plant-based options and using dairy-free chocolate chips. Always check ingredient labels for allergens if you’re preparing this treat for someone with specific dietary restrictions.
A perfect match for this dish—try this recipe!
Conclusion for No-Bake Easter Fudge
No-Bake Easter Fudge is a delightful treat that’s easy to prepare yet full of flavor and charm. By following some essential tips—like using quality ingredients and allowing adequate chilling time—you’ll create a dessert that will impress everyone at your gathering. Remember not to overmix and measure accurately; these small details significantly affect your fudge’s final texture and taste. Whether you stick with classic flavors or experiment with customizations, this no-bake option offers endless possibilities for festive enjoyment during the holiday season!
No-Bake Easter Fudge
- Total Time: 20 minutes
- Yield: Approximately 16 servings 1x
Description
No-Bake Easter Fudge is an irresistible treat that brings a splash of joy to your holiday celebrations. This creamy chocolate fudge, topped with vibrant sprinkles, requires no baking and can be prepared in just a few simple steps. Perfect for sharing with family and friends, this delightful dessert is sure to impress at any gathering!
Ingredients
- 2 cups semi-sweet chocolate chips
- 1 can (14 oz) sweetened condensed milk
- 1/2 cup unsalted butter
- 1 tsp pure vanilla extract
- Colorful sprinkles or toppings of choice
Instructions
- Line an 8×8-inch baking dish with parchment paper.
- In a medium saucepan over low heat, melt the chocolate chips, sweetened condensed milk, and butter, stirring continuously until smooth.
- Remove from heat and stir in vanilla extract.
- Pour the mixture into the prepared dish, spreading evenly.
- While warm, add your chosen toppings and gently press them into the fudge.
- Refrigerate for at least 2 hours or until firm. Lift out using parchment paper and cut into squares.
Notes
Use high-quality chocolate for richer flavor.
Experiment with various toppings like nuts or dried fruits for unique variations.
Allow adequate chilling time to ensure proper texture.
- Prep Time: 15 minutes
- Cook Time: 5 minutes
- Category: Dessert
- Method: No-Bake
- Cuisine: American
Nutrition
- Serving Size: 1 square
- Calories: 140
- Sugar: 16g
- Sodium: 50mg
- Fat: 8g
- Saturated Fat: 5g
- Unsaturated Fat: 3g
- Trans Fat: 0g
- Carbohydrates: 17g
- Fiber: 1g
- Protein: 2g
- Cholesterol: 10mg

Leave a Comment