

There’s something undeniably magical about the moment you crack open a jar of homemade cherry pie filling. The sweet aroma wafts through the kitchen, and suddenly, your heart is dancing like a kid in a candy store. fudgy banana bread brownies You can almost hear those cherries giggling with delight as they prepare to become the star of your dessert show.
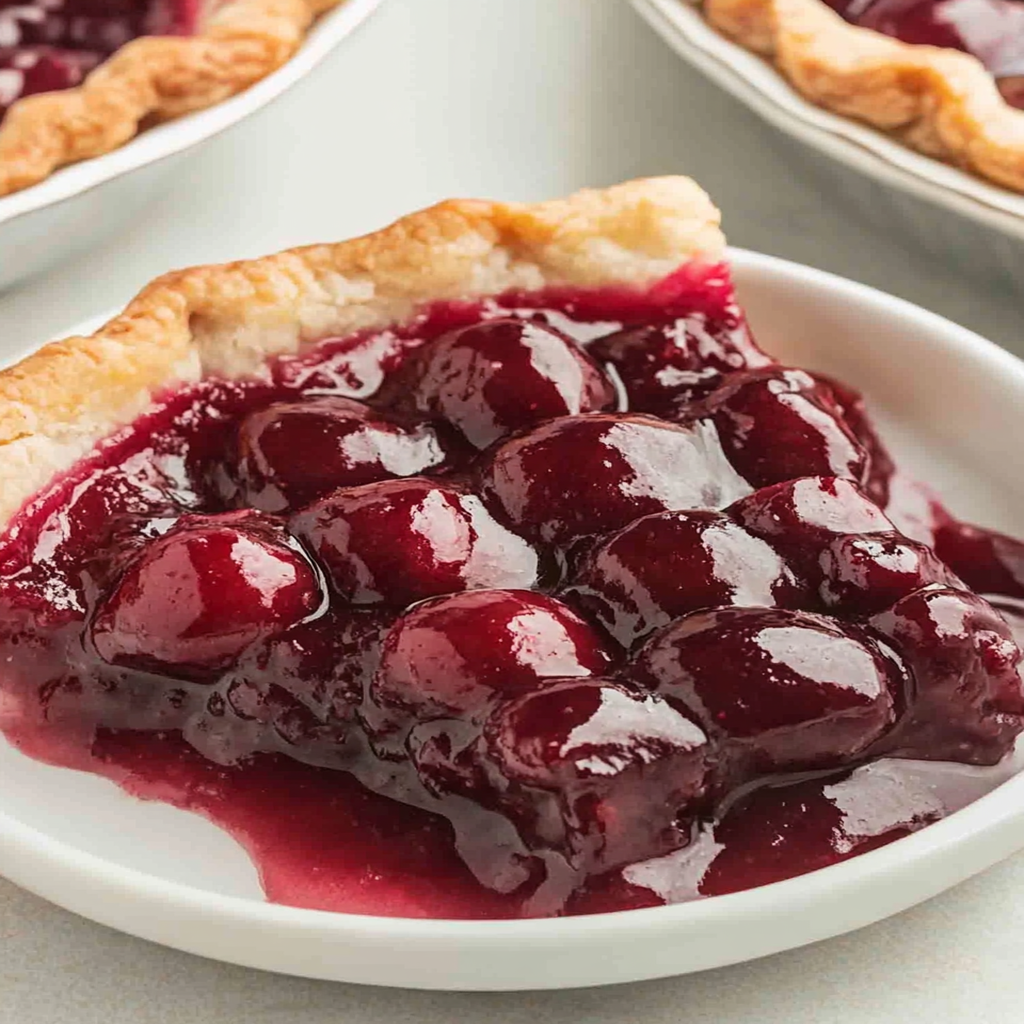
Picture this: it’s a warm summer evening, and you find yourself surrounded by friends and family, laughter echoing around the table. Then someone brings out that glorious cherry pie, its crust golden and flaky, begging to be sliced. refreshing ambrosia salad You’ll want to dive right in! This cherry pie filling will not only impress your guests but will also take you on a delicious trip down memory lane, reminding you of sunny picnics and grandma’s kitchen.
Why You'll Love This Recipe
- This cherry pie filling is incredibly easy to make using just a handful of ingredients.
- Its sweet-tart flavor is perfect for satisfying any dessert craving.
- The vibrant red color adds visual appeal to your baked goods or breakfast treats.
- Plus, it’s versatile enough for pies, tarts, or even spooned over ice cream!
Ingredients for Cherry Pie Filling
For more inspiration, check out this pecan pie bars recipe.
Here’s what you’ll need to make this delicious dish:
- Fresh Cherries: Use ripe, juicy cherries for the best flavor; frozen cherries work well too if fresh ones are unavailable.
- Sugar: Granulated sugar enhances the natural sweetness of cherries; adjust according to your taste buds.
- Cornstarch: This thickening agent gives your filling that perfect gooey consistency; ensure it’s well mixed with other ingredients.
- Lemon Juice: A splash of lemon juice balances out the sweetness and brightens up the flavor profile.
- Vanilla Extract: Pure vanilla extract adds depth, making your filling taste even more divine.
The full ingredients list, including measurements, is provided in the recipe card directly below.
How to Make Cherry Pie Filling
Follow these simple steps to prepare this delicious dish:
Step 1: Prepare Your Cherries
Start by washing and pitting about four cups of fresh cherries (or thaw frozen ones if that’s your jam). Make sure they’re nice and clean—no one wants dirt in their dessert!
Step 2: Combine Ingredients
In a large mixing bowl, toss those beautiful cherries with one cup of granulated sugar and a quarter cup of cornstarch. Add two tablespoons of lemon juice and one teaspoon of vanilla extract for that extra zing. Stir gently until everything is coated—think of it as giving them a fancy spa treatment.
Step 3: Cook It Up
Transfer your cherry mixture into a medium saucepan over medium heat. Stir continuously as it heats up—this is where the magic happens! Within minutes, you’ll start to see the juices bubbling away like they’re excited for their big performance.
Step 4: Thicken It Up
Once it reaches a gentle boil, reduce the heat slightly and continue stirring until the mixture thickens—about three to five minutes should do it. You’ll know it’s ready when it resembles luscious lava!
Step 5: Cool Down
Remove from heat and let it cool for about ten minutes before using or transferring it into jars. Patience pays off here—you don’t want molten cherry lava burning your tongue!
Step 6: Serve with Style
This cherry pie filling is now ready to be encased in a flaky crust or slathered over vanilla ice cream for that ultimate treat! Serve warm or cold; either way, prepare for compliments galore.
Now that you’ve mastered this delightful cherry pie filling recipe, get ready for an explosion of flavor that will make every bite feel like a celebration! Whether you’re hosting friends or just treating yourself (because hey, we all deserve dessert), this filling will surely steal the show—and possibly your heart too! explore our complete recipe index.
You Must Know
- This delightful cherry pie filling recipe not only satisfies your sweet tooth but also makes dessert prep a piece of cake.
- The burst of cherries and sweetness adds color and flavor to any gathering.
- Perfect for pies, tarts, or even spooned straight from the jar!
Perfecting the Cooking Process
Start by pitting the cherries for the filling; it’s like a mini workout for your arms. Next, combine them with sugar, cornstarch, and a splash of lemon juice. Cook on medium heat until bubbly, then let it cool before using.
Add Your Touch
Feel free to swap out some cherries for blueberries or raspberries if you’re feeling fruity. A pinch of almond extract can elevate the flavor profile dramatically. Get creative with spices like cinnamon or nutmeg to add warmth!
Storing & Reheating
Store your cherry pie filling in an airtight container in the fridge for up to one week. To reheat, gently warm it on the stovetop over low heat, stirring occasionally until it’s nice and warm again.
Chef's Helpful Tips
- Always pit your cherries first; it saves time and ensures you don’t bite into a surprise pit later.
- Use fresh cherries for the best flavor; frozen ones can be watery.
- Don’t skip cooling before using; it thickens up nicely!
Sometimes I think my family believes I’m a magician when I whip up this cherry pie filling. One time at a family gathering, my cousin declared that “magic” was involved because they couldn’t believe how delicious it was!
FAQs :
What is Cherry Pie Filling made of?
Cherry Pie Filling typically consists of fresh or canned cherries, sugar, cornstarch, and a splash of lemon juice. The cherries provide natural sweetness and tartness, while the sugar enhances the flavor and helps with thickening. Cornstarch acts as a thickener, giving the filling that desirable consistency. Some recipes also include vanilla extract or almond extract for added depth of flavor. You can use this filling in various desserts, not just pies. For more inspiration, check out this baked apples recipe recipe.
How do I store Cherry Pie Filling?
To store Cherry Pie Filling, first allow it to cool completely if you have just made it. Transfer the filling into an airtight container and refrigerate it. It can stay fresh in the fridge for about one week. For longer storage, consider freezing it. Place the cooled filling in freezer-safe bags or containers; it can last up to six months in the freezer. When ready to use, simply thaw it in the refrigerator overnight.
Can I use frozen cherries for making Cherry Pie Filling?
Yes, you can definitely use frozen cherries for making Cherry Pie Filling. In fact, they are often more convenient and still yield delicious results. Be sure to thaw them before using and drain any excess liquid to prevent a watery filling. Adjust the sugar based on their sweetness since frozen cherries may vary in taste compared to fresh ones. This way, you can enjoy cherry pie throughout the year!
How can I make my Cherry Pie Filling thicker?
If you want your Cherry Pie Filling to be thicker, increase the amount of cornstarch used in your recipe. Start with one tablespoon per cup of cherries and adjust as needed based on your preference. Another option is to let the filling simmer longer on low heat to reduce excess moisture naturally. Adding a small amount of gelatin can also help set the filling without altering its flavor significantly.
Conclusion for Cherry Pie Filling :
In summary, Cherry Pie Filling is a delightful and versatile ingredient that can enhance many desserts beyond traditional pies. Made primarily from cherries, sugar, and cornstarch, this filling offers fantastic flavor and texture. Proper storage methods ensure freshness whether refrigerated or frozen. Feel free to experiment with ingredients like vanilla or almond extracts for added depth! With these tips and tricks in hand, you’re now ready to create your perfect Cherry Pie Filling at home!
Cherry Pie Filling
- Total Time: 25 minutes
- Yield: Approximately 4 servings 1x
Description
Cherry Pie Filling is a delightful burst of sweet-tart flavor that transforms any dessert into a showstopper. Made with fresh cherries, sugar, and a hint of lemon juice, this easy-to-follow recipe creates a luscious filling perfect for pies, tarts, or even spooned over ice cream. Its vibrant red color and rich taste will evoke fond memories of summer gatherings, making it a must-have treat in your kitchen.
Ingredients
- 4 cups fresh cherries (pitted)
- 1 cup granulated sugar
- 1/4 cup cornstarch
- 2 tbsp lemon juice
- 1 tsp vanilla extract
Instructions
- Prepare the cherries by washing and pitting them.
- In a large bowl, combine cherries with sugar, cornstarch, lemon juice, and vanilla extract; mix gently.
- Transfer the mixture to a saucepan and heat over medium heat, stirring continuously until juices bubble.
- Reduce heat and cook until thickened (3-5 minutes).
- Remove from heat and cool for 10 minutes before using.
- Prep Time: 15 minutes
- Cook Time: 10 minutes
- Category: Dessert
- Method: Cooking
- Cuisine: American
Nutrition
- Serving Size: 1/4 cup (60g)
- Calories: 80
- Sugar: 18g
- Sodium: 0mg
- Fat: 0g
- Saturated Fat: 0g
- Unsaturated Fat: 0g
- Trans Fat: 0g
- Carbohydrates: 20g
- Fiber: 1g
- Protein: 1g
- Cholesterol: 0mg
Leave a Comment