

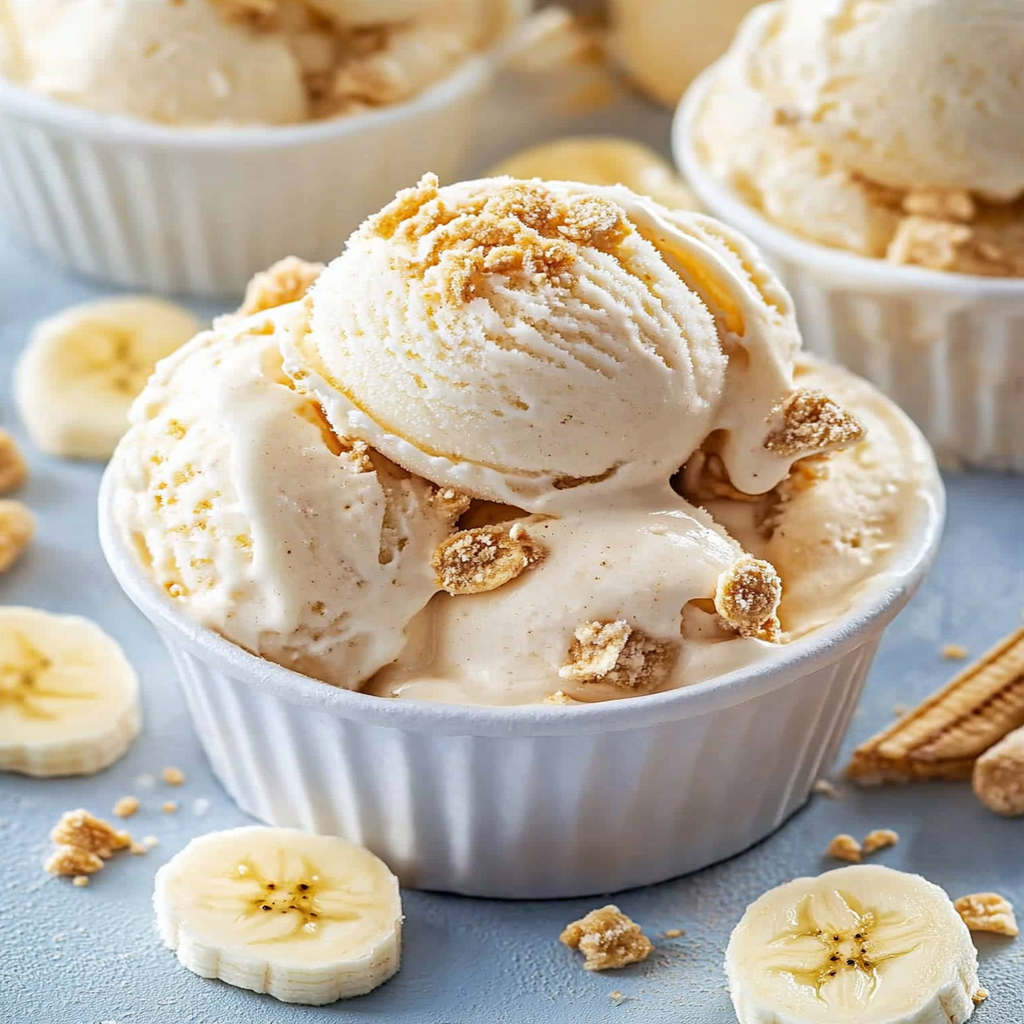
The perfect treat for those hot summer days (or any day, really), No Churn Banana Ice Cream is like a whimsical dance party for your taste buds. Imagine the sweet, creamy goodness melting in your mouth, with hints of banana flavor that make you feel like you’re lounging on a tropical beach. gingerbread cinnamon rolls It’s a dessert that brings joy with every spoonful and zero guilt because it’s made with bananas!
Now, let me take you back to my childhood. I remember my mom whipping up this delightful concoction on lazy Sunday afternoons. We would all gather around the kitchen, eagerly awaiting the sweet reward for our patience. Little did we know, she was actually just trying to use up all those overripe bananas sitting on the counter. But hey, it turned out to be one of our favorite family traditions! Whether it’s a backyard barbecue or a cozy movie night, this No Churn Banana Ice Cream is the ultimate crowd-pleaser that promises smiles all around. For more inspiration, check out this Cinnamon Pear Walnut Crumble recipe.
Why You'll Love This Recipe
- This No Churn Banana Ice Cream requires minimal effort while delivering maximum flavor satisfaction.
- Its smooth and creamy texture will have you coming back for seconds (and thirds!).
- With its beautiful golden hue, it’s as pleasing to the eyes as it is to the palate.
- Plus, it’s incredibly versatile; feel free to mix in your favorite toppings or add-ins!
Ingredients for No Churn Banana Ice Cream
Here’s what you’ll need to make this delicious dish:
- Ripe Bananas: The riper they are, the sweeter your ice cream will be! Look for bananas with plenty of brown spots.
- Coconut Milk: Use full-fat coconut milk for a rich and creamy texture that complements the bananas perfectly.
- Honey or Maple Syrup: This adds natural sweetness; adjust according to your taste preference.
- Vanilla Extract: A splash of vanilla enhances the flavors and makes everything taste more amazing.
- Pinch of Salt: Just a tiny bit balances out the sweetness and elevates all the flavors.
The full ingredients list, including measurements, is provided in the recipe card directly below.
How to Make No Churn Banana Ice Cream
Follow these simple steps to prepare this delicious dish:
Step 1: Prepare Your Bananas
Start by peeling those lovely ripe bananas and slicing them into small pieces. This ensures they blend smoothly into that luscious ice cream base.
Step 2: Blend Away
In a blender or food processor, combine the banana slices, coconut milk, honey (or maple syrup), vanilla extract, and a pinch of salt. Blend until super smooth—no lumps allowed!
Step 3: Taste Test Time
Here’s where you get to channel your inner chef! Take a quick taste test and decide if you want it sweeter. Adjust with more honey or syrup if necessary.
Step 4: Freeze It Up
Pour your dreamy banana mixture into a freezer-safe container. Smooth out the top with a spatula for even freezing. Cover it tightly with plastic wrap or a lid.
Step 5: Chill Out
Place your container in the freezer and let it chill for at least four hours or until it reaches your desired ice cream consistency.
Step 6: Scooping Time
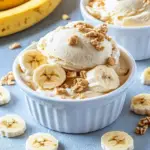
Once frozen solid, take it out and let it sit at room temperature for about five minutes before scooping. Transfer to bowls and enjoy!
Serve this delightful No Churn Banana Ice Cream immediately or store leftovers in an airtight container for future cravings. You’ll be dreaming about this creamy delight long after your last scoop—trust me!
You Must Know
- Making No Churn Banana Ice Cream is a breeze.
- With just a few ripe bananas and some basic ingredients, you can whip up a creamy dessert that requires no fancy equipment.
- It’s the perfect treat for hot days or any time you crave something sweet.
Perfecting the Cooking Process
First, peel and slice your ripe bananas, then freeze them for a couple of hours. Once frozen, blend the bananas in a food processor until smooth and creamy. Add any flavorings or mix-ins before scooping into containers and freezing again to achieve the perfect texture.
Add Your Touch
Feel free to customize your No Churn Banana Ice Cream! Swap out some bananas for other fruits like mango or berries. You can also add chocolate chips, nuts, or a splash of vanilla extract for extra flavor. The possibilities are endless!
Storing & Reheating
Store your No Churn Banana Ice Cream in an airtight container in the freezer. For best results, consume within two weeks. If it becomes too hard, let it sit at room temperature for a few minutes before scooping.
Chef's Helpful Tips
- To achieve the creamiest No Churn Banana Ice Cream, use very ripe bananas as they have the sweetest flavor.
- Blend thoroughly to avoid lumps and ensure smoothness.
- Don’t skip freezing the mixture after blending—it’s key to that delightful ice cream texture!
I remember the first time I made No Churn Banana Ice Cream for my friends at a summer barbecue. They couldn’t believe it was so simple—and they devoured it faster than I could scoop!
FAQs:
What is No Churn Banana Ice Cream?
No Churn Banana Ice Cream is a delicious and easy dessert made without an ice cream maker. You simply blend ripe bananas with cream and sweeteners to create a smooth, creamy treat. This recipe is perfect for those who want a quick and satisfying dessert without the hassle of traditional ice cream methods. delicious creme brulee cookies and cream cookies It’s also a great way to use overripe bananas, ensuring nothing goes to waste while indulging in a healthy alternative.
How do I store No Churn Banana Ice Cream?
To store No Churn Banana Ice Cream, place it in an airtight container and keep it in the freezer. Proper storage will help maintain its creamy texture and flavor. It’s best consumed within one week for optimal freshness, but it can last longer if stored properly. Before serving, let it sit at room temperature for a few minutes to soften slightly, making it easier to scoop.
Can I add flavors to No Churn Banana Ice Cream?
Yes, you can easily customize No Churn Banana Ice Cream by adding different flavors. Consider mixing in ingredients like vanilla extract, cocoa powder, peanut butter, or chocolate chips. delicious chocolate chocolate chip muffins You can also fold in fruits like berries or nuts for added texture and taste. This versatility allows you to create your favorite combinations while keeping the basic recipe intact. For more inspiration, check out this Peanut Butter Cookies recipe.
Is No Churn Banana Ice Cream healthy?
No Churn Banana Ice Cream can be considered a healthier alternative to traditional ice cream. Made primarily from bananas and cream, it contains natural sugars and fewer additives than commercial ice creams. By using ripe bananas, you also benefit from their vitamins and minerals. However, moderation is key; enjoy this dessert as part of a balanced diet for the best results.
Conclusion for No Churn Banana Ice Cream:
In summary, No Churn Banana Ice Cream offers a simple yet delightful way to enjoy a frozen treat without an ice cream maker. With just ripe bananas and cream as your main ingredients, you can whip up a dessert that caters to your taste preferences. Feel free to experiment with flavors or mix-ins for added enjoyment. This quick recipe not only satisfies sweet cravings but also helps reduce food waste by using overripe bananas effectively.
No Churn Banana Ice Cream
- Total Time: 0 hours
- Yield: About 4 servings 1x
Description
No Churn Banana Ice Cream is a creamy, guilt-free treat that’s perfect for hot summer days or anytime you crave something sweet. This easy recipe requires no ice cream maker, making it accessible for everyone. With ripe bananas, rich coconut milk, and a hint of vanilla, this frozen delight is not only delicious but also nutritious. Enjoy it plain or customize it with your favorite mix-ins for a delightful dessert that the whole family will love.
Ingredients
- 4 ripe bananas (about 500g)
- 1 cup full-fat coconut milk (240ml)
- ¼ cup honey or maple syrup (60ml)
- 1 tsp vanilla extract (5ml)
- Pinch of salt
Instructions
- Peel and slice the ripe bananas into small pieces.
- In a blender or food processor, combine banana slices, coconut milk, honey (or maple syrup), vanilla extract, and salt. Blend until smooth.
- Taste the mixture and adjust sweetness if needed by adding more honey or syrup.
- Pour the mixture into a freezer-safe container and smooth the top with a spatula.
- Cover tightly with plastic wrap or a lid and freeze for at least 4 hours until solid.
- Before serving, let it sit at room temperature for about 5 minutes to soften slightly. Scoop into bowls and enjoy!
- Prep Time: 10 minutes
- Cook Time: Freeze for at least 4 hours
- Category: Dessert
- Method: No Churn
- Cuisine: American
Nutrition
- Serving Size: ½ cup (120g)
- Calories: 170
- Sugar: 24g
- Sodium: 10mg
- Fat: 7g
- Saturated Fat: 6g
- Unsaturated Fat: 0.5g
- Trans Fat: 0g
- Carbohydrates: 26g
- Fiber: 3g
- Protein: 2g
- Cholesterol: 0mg
Leave a Comment