

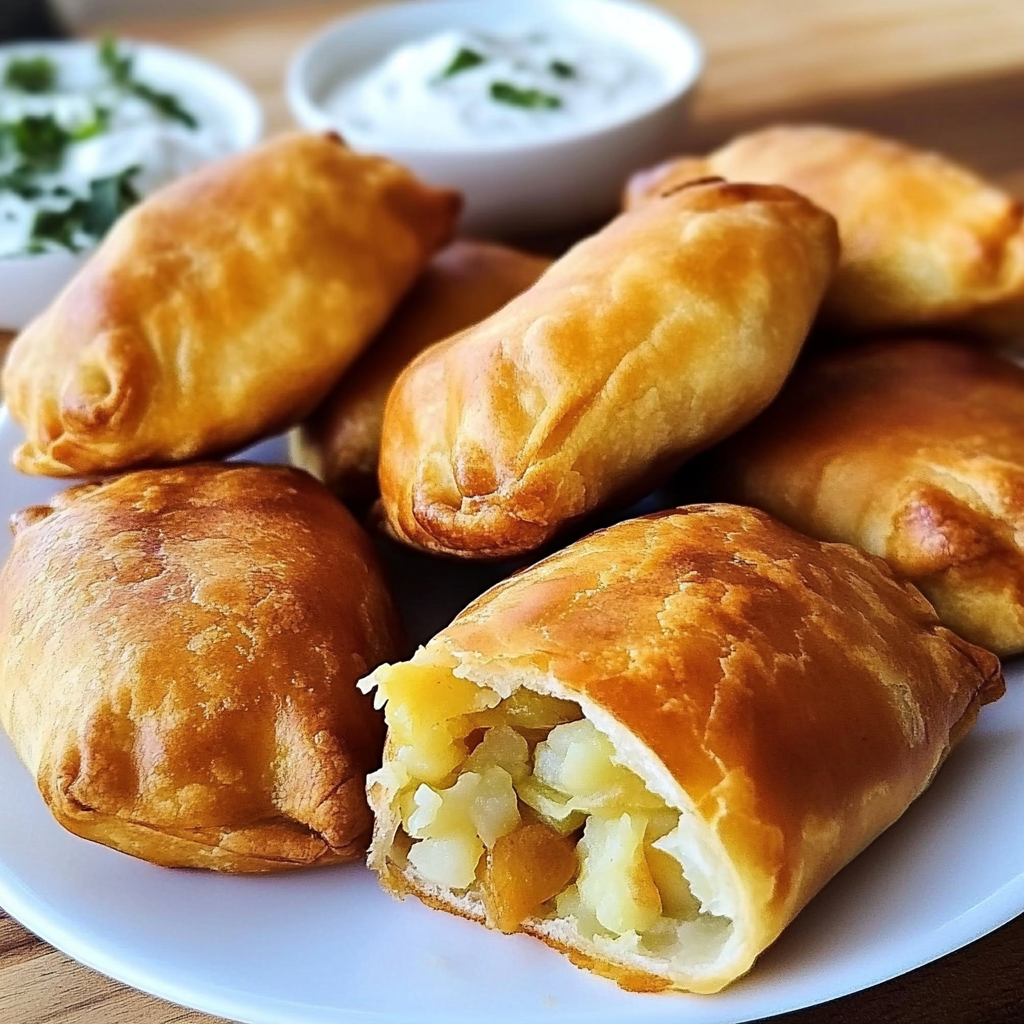
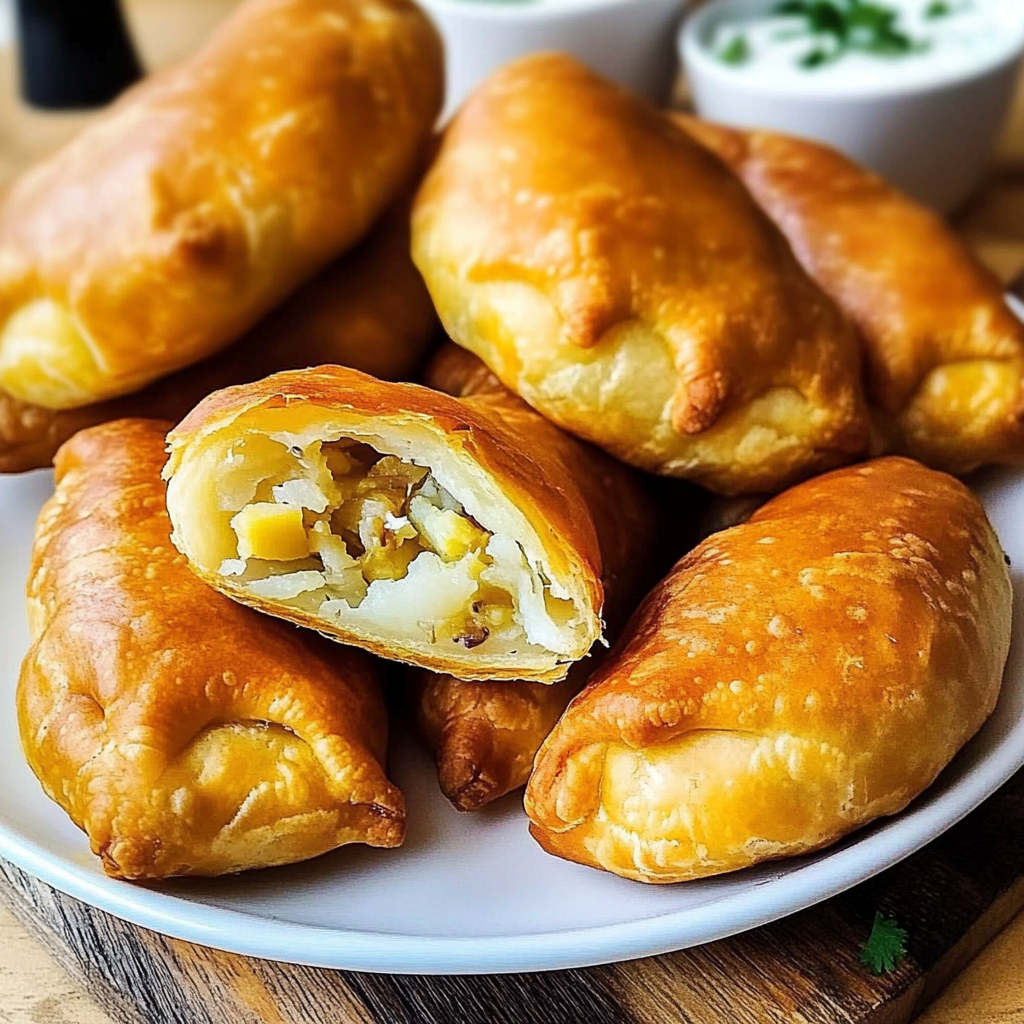
Russian Potato Piroshki with Garlic Dip is a delightful dish that brings comfort food to a whole new level. These little pastries are filled with creamy mashed potatoes and seasoned to perfection. Whether you’re hosting a party or just looking for a satisfying snack, this recipe is sure to impress your friends and family. The warm, flaky exterior perfectly complements the rich potato filling, and when paired with a zesty garlic dip, each bite becomes an explosion of flavor. Perfectly golden brown on the outside and soft on the inside, these piroshki will quickly become a household favorite. Plus, they’re surprisingly easy to make! With simple ingredients and straightforward steps, you can create an authentic taste of Russia in your own kitchen. So roll up your sleeves and get ready to enjoy these scrumptious bites that are perfect for any occasion.
Why You’ll Love This Russian Potato Piroshki with Garlic Dip
- Quick and Easy: Minimal prep time and straightforward steps make this recipe stress-free, even for novice cooks
- Flavorful and Versatile: Enjoy outstanding flavor with ingredients you can easily customize by adding your favorites or adjusting spices
- Perfect for Any Occasion: Ideal for casual gatherings, holiday celebrations, or weeknight dinners

Explore more delicious recipes here
Delicious Mashed Potato Casserole with Crispy Chicken Recipe
Ingredients for Russian Potato Piroshki with Garlic Dip
Here’s what you’ll need to make this delicious dish:
- All-Purpose Flour: About 4 cups of flour will form the base of your dough; ensure it’s sifted for best results.
- Active Dry Yeast: One packet (about 2¼ teaspoons) helps the dough rise beautifully.
- Milk: Use about one cup of warm milk to activate the yeast and enrich the dough.
- Butter: About four tablespoons provide richness; melted butter works best.
- Peeled Potatoes: About two large potatoes should be boiled until tender for the filling.
- Onion: One medium onion adds savory depth; finely chop it before cooking.
- Salt and Pepper: Basic seasonings enhance all flavors; adjust according to taste.
For the Garlic Dip:
- Sour Cream: Use one cup as the base of your dip for creaminess.
- Fresh Garlic: One or two cloves minced will add a robust flavor profile to your dip.
The full ingredients list, including measurements, is provided in the recipe card directly below.
How to Make Russian Potato Piroshki with Garlic Dip
Follow these simple steps to prepare this delicious dish:
Step 1: Prepare the Dough
In a large bowl, combine warm milk and active dry yeast. Let it sit until frothy, about five minutes. Then add melted butter and salt before gradually mixing in all-purpose flour until a soft dough forms.
Step 2: Knead the Dough
Transfer the dough onto a floured surface and knead it for about ten minutes until smooth and elastic. Place it in a greased bowl, cover it with a cloth, and let it rise in a warm place until doubled in size—approximately one hour.
Step 3: Make the Filling
While waiting for the dough to rise, boil peeled potatoes until fork-tender. Drain them well before mashing together with sautéed onions (sautéed until golden) along with salt and pepper.
Step 4: Shape the Piroshki
Once risen, punch down the dough. Divide it into small balls (about golf ball size). Roll each piece into a circle before placing a spoonful of potato filling in the center. Pinch edges together securely.
Step 5: Fry or Bake
Heat oil in a pan over medium heat if frying or preheat your oven to bake at375°F (190°C). If baking, arrange piroshki on lined baking sheets brushed with egg wash. Bake until golden brown—around twenty minutes.
Step 6: Prepare Garlic Dip
In a small bowl mix sour cream with minced garlic until well combined. Adjust seasoning as needed.
Transfer to plates and serve hot alongside garlic dip for the perfect finishing touch.
Craving something different? Check this out
Tips and Tricks
Here are some helpful tips to ensure the best results for your dish:
-
- Kneading Technique: Ensure you knead thoroughly; this develops gluten which provides structure.
-
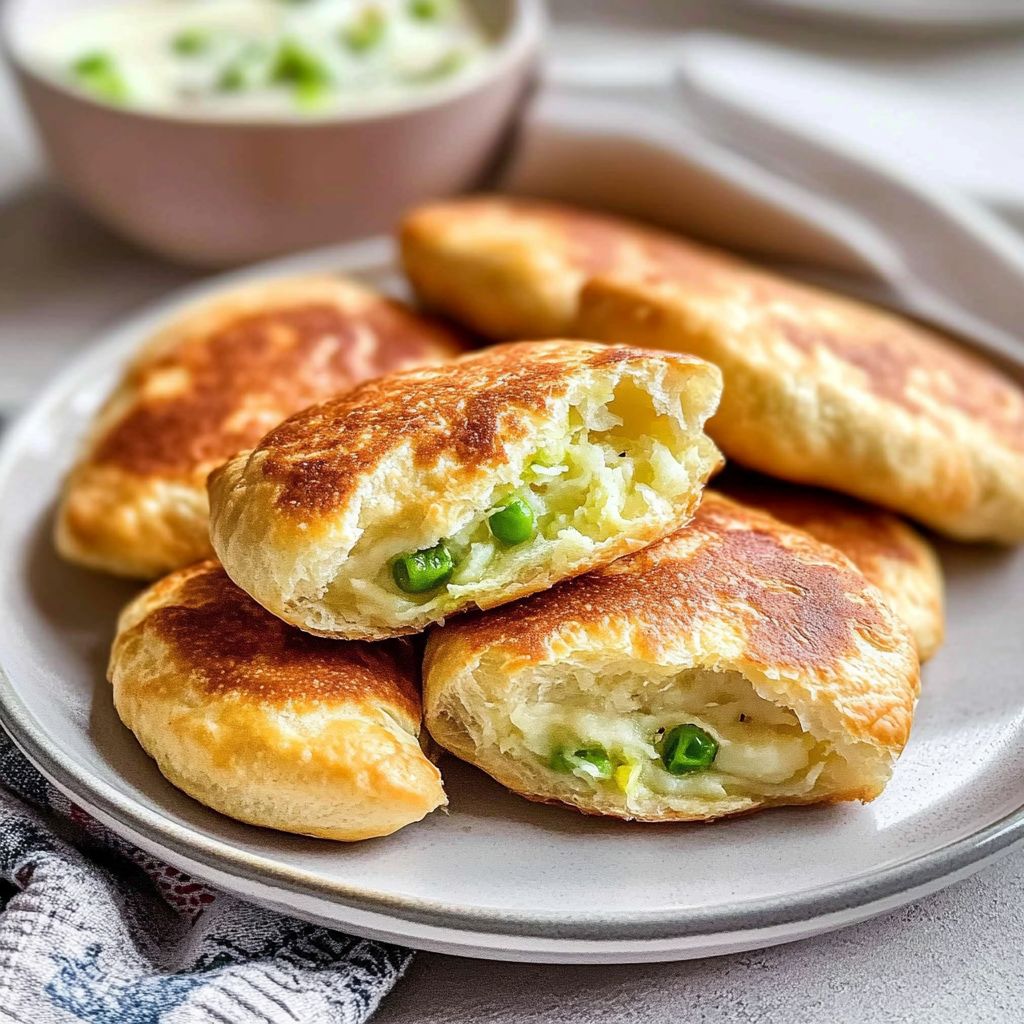
- Filling Variations: Feel free to experiment by adding herbs or cheese to your potato filling.
- Baking Option: For healthier piroshki, opt to bake instead of fry; they’ll still be delicious!
How to Serve Russian Potato Piroshki with Garlic Dip
This Russian Potato Piroshki with Garlic Dip is versatile and pairs wonderfully with:
- Rice or Potatoes: A hearty base that soaks up the delicious sauce.
- Fresh Salad: Adds a crisp and refreshing contrast to the rich flavors of the dish.
- Crusty Bread: Perfect for enjoying every last drop of the flavorful sauce.
Feel free to pair it with your favorite sides for a personalized meal!
Discover more tasty ideas for your next meal
Make Ahead and Storage
- Make Ahead: You can prepare the filling for the Russian Potato Piroshki in advance. Cook and mash the potatoes, then mix in your seasonings. Store this mixture in an airtight container in the refrigerator for up to three days before using.
- Storing: If you have leftovers, place them in an airtight container. They can be stored in the refrigerator for up to four days. For longer storage, freeze them by placing them in a freezer-safe bag; they will keep well for up to three months.
- Reheating: To reheat, place the piroshki on a baking sheet and warm them in a preheated oven at 350°F (175°C) for about 15-20 minutes until heated through. Alternatively, you can microwave them on a plate covered with a damp paper towel for about one minute.
Suggestions for Russian Potato Piroshki with Garlic Dip
Use Fresh Ingredients
Using fresh ingredients is crucial when preparing Russian Potato Piroshki with Garlic Dip. Fresh potatoes will provide the best flavor and texture, enhancing the overall dish. Stale or old ingredients can lead to a lackluster taste that detracts from the authentic experience of this classic recipe. Always check the quality of your potatoes before cooking. Additionally, ensure your garlic is fresh for the dip. Aged garlic can taste bitter and spoil the creamy dip’s delightful profile. Investing in fresh, high-quality ingredients will elevate your piroshki and impress your guests.
Don’t Rush the Dough
Making the dough for Russian Potato Piroshki requires patience. Rushing through this process can lead to tough or uneven dough, affecting the final product’s texture. Allow the dough to rest after kneading; this relaxes gluten and makes it more pliable for shaping. Rolling out too quickly can make it difficult to fill properly, resulting in messy piroshki that may burst during frying or baking. Take your time to achieve that perfect balance between softness and structure, ensuring each piroshok holds its delicious potato filling beautifully.
Mind Your Filling Ratios
When creating the filling for your Russian Potato Piroshki with Garlic Dip, be mindful of the ratio between potatoes and seasonings. Too much seasoning can overpower the natural flavor of the potatoes, making it less enjoyable. Conversely, too little seasoning can render your filling bland. Aim for a harmonious blend of spices, herbs, and potatoes to create a deliciously balanced taste. Experiment with different ratios during preparation to find what suits your palate best while keeping traditional flavors intact.
Control Cooking Temperature
Cooking temperature plays a vital role in achieving perfectly golden-brown piroshki. If the oil is too hot, they may cook too quickly on the outside while remaining raw inside. Conversely, if it’s too cool, they’ll absorb excess oil and become greasy. Use a thermometer to monitor oil temperature or test it using a small piece of dough; it should sizzle when added to hot oil. Maintaining an even cooking temperature ensures that each piroshok has that delightful crispy exterior without sacrificing the soft interior.
Want more flavorful dishes? See our favorites
FAQs
What are Russian Potato Piroshki?
Russian Potato Piroshki are small pastry pockets filled with seasoned mashed potatoes, often flavored with onion or herbs. These delicious dumplings can be baked or fried until golden brown and are typically served as snacks or appetizers, accompanied by dips like garlic sauce for extra flavor.
How do I make garlic dip for my piroshki?
To prepare a simple garlic dip for your Russian Potato Piroshki with Garlic Dip, combine sour cream or yogurt with minced garlic, lemon juice, salt, and pepper in a bowl. Adjust seasoning according to your taste preferences and let it chill in the refrigerator before serving for improved flavor infusion.
Can I freeze cooked piroshki?
Yes! You can freeze cooked Russian Potato Piroshki for later enjoyment. Allow them to cool completely before placing them in an airtight container or freezer bag. When ready to eat, reheat them directly from frozen in an oven or air fryer until heated through. This way, they retain their delightful texture and flavor.
What variations can I try with piroshki fillings?
While potato is a classic filling for Russian Piroshki, feel free to experiment with other fillings! Options include sautéed mushrooms, meat mixtures like beef or chicken, sauerkraut combined with mushrooms, or even sweet fillings such as jam or fruit preserves for dessert versions of these pastries.
Looking for another great recipe? Click here
Conclusion for Russian Potato Piroshki with Garlic Dip
In summary, mastering Russian Potato Piroshki with Garlic Dip involves several key considerations: using fresh ingredients ensures vibrant flavors; taking your time with dough preparation creates a tender pastry; balancing filling ratios enhances taste; and controlling cooking temperatures guarantees perfect results every time. By avoiding common mistakes and following these tips closely, you can create delightful piroshki that will impress family and friends alike. Enjoy this beloved dish paired with a creamy garlic dip that elevates its flavors even further!

Russian Potato Piroshki with Garlic Dip
- Total Time: 1 hour
- Yield: Approximately 12 servings 1x
Description
Russian Potato Piroshki with Garlic Dip are delectable, golden pastries filled with creamy mashed potatoes and served alongside a zesty garlic dip. These savory snacks are perfect for gatherings or as a cozy treat at home. With a flaky exterior and rich filling, they offer an authentic taste of Russian cuisine that’s surprisingly easy to make. Impress your friends and family with this delightful recipe that combines comfort food with bold flavors!
Ingredients
- 4 cups all-purpose flour
- 2¼ teaspoons active dry yeast
- 1 cup warm milk
- 4 tablespoons melted butter
- 2 large peeled potatoes
- 1 medium onion
- Salt and pepper to taste
- 1 cup sour cream
- 1–2 cloves fresh garlic
Instructions
- In a large bowl, combine warm milk and yeast; let froth for 5 minutes. Add melted butter and salt, then gradually mix in flour until a soft dough forms.
- Knead dough on a floured surface for about 10 minutes until smooth. Place in a greased bowl, cover, and let rise in a warm place for about an hour or until doubled in size.
- Boil potatoes until tender, mash with sautéed onions, salt, and pepper.
- Once risen, punch down the dough and divide into small balls. Roll each ball into circles, fill with potato mixture, and seal edges.
- Fry in hot oil or bake at 375°F (190°C) for about 20 minutes until golden brown.
- Mix sour cream with minced garlic for the dip.
Notes
Experiment with fillings by adding cheese or herbs to the potato mixture.
Bake instead of fry for a healthier option without sacrificing flavor.
- Prep Time: 30 minutes
- Cook Time: 30 minutes
- Category: Appetizer
- Method: Baking/Frying
- Cuisine: Russian
Nutrition
- Serving Size: 1 serving
- Calories: 150
- Sugar: 1g
- Sodium: 180mg
- Fat: 6g
- Saturated Fat: 3g
- Unsaturated Fat: 2g
- Trans Fat: 0g
- Carbohydrates: 22g
- Fiber: 2g
- Protein: 4g
- Cholesterol: 10mg


Leave a Comment