

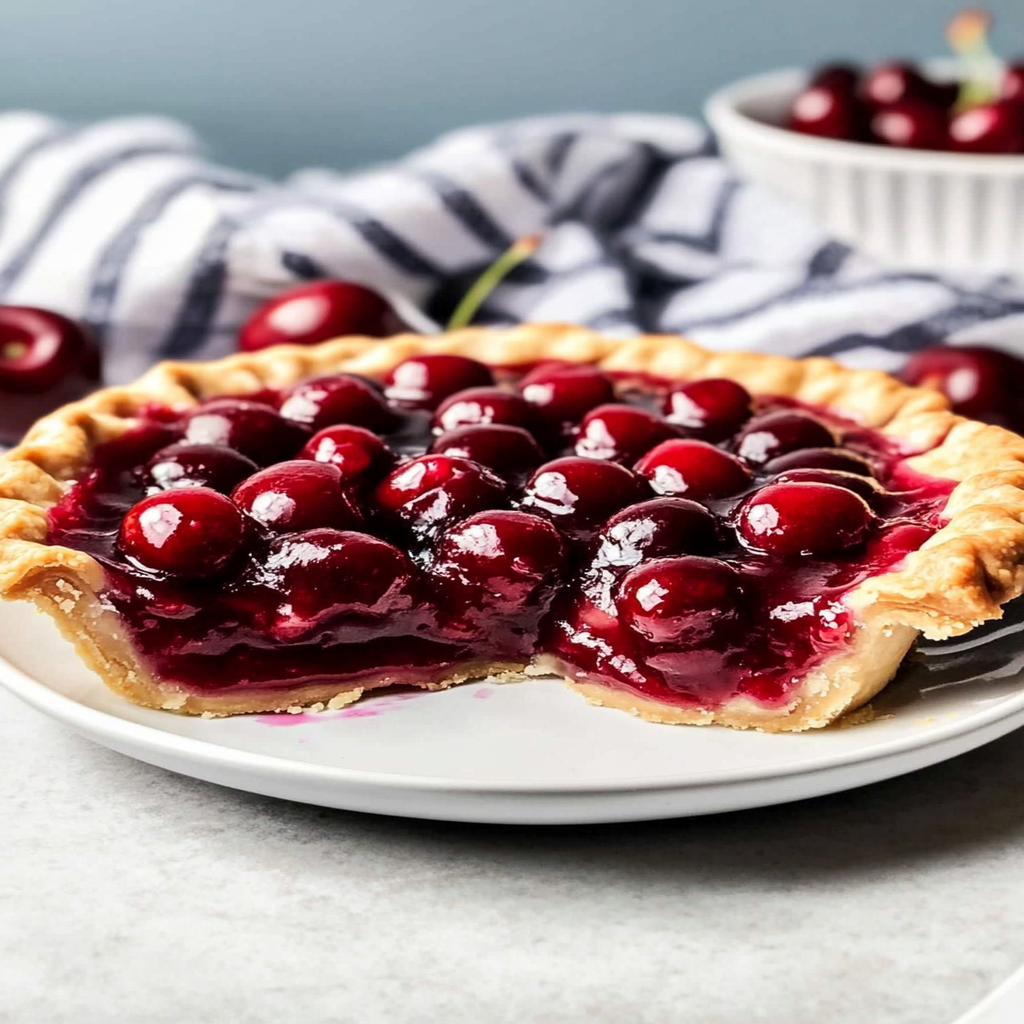
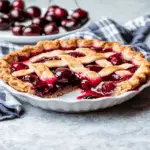
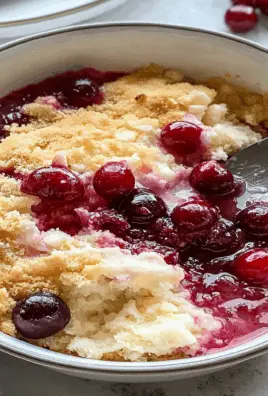
Cherry pie filling is like a cozy hug on a plate, bursting with the sweet, tart flavor of ripe cherries and enveloped in a rich, syrupy goodness. Imagine slicing into a warm pie, the enticing aroma wafting through the air, beckoning you to take that first heavenly bite. Trust me; it’s an experience that dances on your taste buds and warms your heart, perfect for family gatherings or simply indulging in a slice all by yourself. For more inspiration, check out this Baked Apples with Feta recipe.
Thinking back to childhood summers spent at grandma’s house, I can almost hear her laughter as she taught me the art of making cherry pie filling. With each cherry we pitted together, she shared stories of family traditions and unforgettable memories. Patriotic Popsicles This dish isn’t just about the ingredients; it’s about creating moments that linger long after the last bite. So, grab your apron, and let’s dive into this delightful journey of flavors!
Why You'll Love This Recipe
- This cherry pie filling is incredibly easy to prepare, making it perfect for both novice bakers and seasoned pros.
- The vibrant red color and glossy finish make it visually appealing for any dessert table.
- Enjoy it as a pie or use it as a topping for ice cream or pancakes—a true crowd-pleaser!
- Plus, it’s versatile enough to be customized with spices or additional fruits based on your preference.
Ingredients for Cherry Pie Filling
Here’s what you’ll need to make this delicious dish:
- Fresh Cherries: Opt for ripe cherries—sweet or tart—depending on your flavor preference. Pitting them is essential; no one wants a surprise pit!
- Sugar: Granulated sugar enhances the natural sweetness of the cherries while balancing their tartness.
- Cornstarch: This thickening agent helps achieve that perfect consistency, turning juices into a luscious filling.
- Lemon Juice: A splash of lemon juice brightens up the flavors and adds a refreshing zing.
- Vanilla Extract: A dash of vanilla brings depth to the filling and complements the cherries beautifully.
The full ingredients list, including measurements, is provided in the recipe card directly below.
How to Make Cherry Pie Filling
Follow these simple steps to prepare this delicious dish:
Step 1: Prepare Your Cherries
Start by washing your fresh cherries thoroughly under running water. Once clean, carefully pit them using a cherry pitter or a sharp knife—your fingers may get sticky but trust me, it’s worth it!
Step 2: Mix Dry Ingredients
In a medium bowl, combine granulated sugar and cornstarch. Stir them together until well mixed—this will ensure even sweetness throughout your filling.
Step 3: Combine Ingredients
Add the prepared cherries to the bowl with sugar and cornstarch mixture. Gently fold everything together until all cherries are coated with that sugary goodness.
Step 4: Add Flavor Enhancers
Drizzle in some fresh lemon juice and vanilla extract over the cherry mixture. Give everything another gentle stir to incorporate those delightful flavors.
Step 5: Cook It Up
Transfer your cherry mixture into a medium saucepan over medium heat. Cook while stirring occasionally until it starts bubbling and thickens—this should take about 5-10 minutes.
Step 6: Cool Down Before Use
Once thickened to your desired consistency, remove from heat and let it cool completely before using it as pie filling or topping!
Transfer this luscious cherry pie filling into your favorite crust or pour over some creamy vanilla ice cream for an indulgent treat! Blueberry Cream Pie Bars.
Now you’re ready to impress friends and family with this delightful homemade cherry pie filling! Enjoy every blissful bite!
You Must Know
- This cherry pie filling is not just for pies; it can jazz up desserts like cheesecakes or even breakfast pancakes.
- With its vibrant color and sweet-tart flavor, it steals the show at any gathering.
- Perfect for both classic and creative dishes!
Perfecting the Cooking Process
Start by pitting the cherries, then combine them with sugar and cornstarch in a saucepan. Cook over medium heat until bubbly, stirring occasionally. Once thickened, remove from heat and let cool before using.
Add Your Touch
Feel free to swap out some of the cherries for blueberries or raspberries for a mixed berry delight. Festive Berry Trifle Cups You could also add a splash of almond extract for an extra layer of flavor.
Storing & Reheating
Store your cherry pie filling in an airtight container in the fridge for up to one week. To reheat, simply warm it on the stovetop or in the microwave until heated through, stirring occasionally.
Chef's Helpful Tips
- Use fresh, ripe cherries for the best flavor and sweetness.
- If using frozen cherries, thaw them completely before cooking to avoid excess moisture.
- Always taste your filling before adding more sugar; sweetness levels can vary significantly based on cherry ripeness.
Sometimes I catch myself reminiscing about that summer picnic where this cherry pie filling stole the spotlight—friends were raving about it while I was just trying to keep a straight face!
FAQs :
What ingredients do I need for Cherry Pie Filling?
To make a delicious cherry pie filling, you’ll need fresh or frozen cherries, sugar, cornstarch, lemon juice, and vanilla extract. If you prefer a more intense flavor, consider adding almond extract. Sourdough Croutons for Dessert The combination of these ingredients creates the perfect balance of sweetness and tartness. You can use this filling not only for pies but also for tarts and other desserts.
How long does homemade Cherry Pie Filling last?
Homemade cherry pie filling can last up to one week when stored in an airtight container in the refrigerator. If you want to extend its shelf life, consider freezing it. Properly stored in the freezer, cherry pie filling can remain good for up to six months. Just make sure to thaw it in the fridge before using it in your favorite recipes. For more inspiration, check out this Pecan Pie Bars Recipe recipe.
Can I use canned cherries for making Cherry Pie Filling?
Yes, you can use canned cherries to make cherry pie filling. However, it’s essential to drain them well and adjust the sugar accordingly since canned cherries are often packed in syrup. For a fresher taste, try adding a splash of lemon juice or some vanilla extract to enhance the flavor. This method can save time while still delivering a tasty result.
How do I thicken my Cherry Pie Filling?
To thicken your cherry pie filling, cornstarch is a popular choice among bakers. Mix cornstarch with some cold water before adding it to your cherry mixture on the stove. This method allows the filling to achieve the desired consistency without clumping. You can also use tapioca or flour as thickening alternatives if preferred.
Conclusion for Cherry Pie Filling :
In summary, making cherry pie filling at home is straightforward and rewarding. By using fresh or frozen cherries along with simple ingredients like sugar and cornstarch, you’ll create a delightful filling perfect for various desserts. Remember that homemade versions provide superior flavor and freshness compared to store-bought options. Whether you’re making a classic pie or experimenting with tarts, this cherry pie filling will impress everyone at your table!
Cherry Pie Filling
- Total Time: 25 minutes
- Yield: Approximately 4 servings (2 cups total) 1x
Description
Cherry pie filling is a sweet and tangy treat that captures the essence of summer in every bite. Made with ripe cherries and a luscious syrup, this homemade filling elevates pies, ice cream, and pancakes alike. With just a few simple ingredients and easy steps, you can create a delicious topping that brings back fond memories of family gatherings and sunny afternoons. Whether you’re sharing it at a special dessert table or savoring a slice solo, this cherry pie filling will delight your taste buds.
Ingredients
- 4 cups fresh cherries, pitted
- 1 cup granulated sugar
- ¼ cup cornstarch
- 2 tbsp lemon juice
- 1 tsp vanilla extract
Instructions
- Rinse the cherries thoroughly and pit them.
- In a bowl, mix together the granulated sugar and cornstarch until combined.
- Gently fold the pitted cherries into the sugar mixture until well coated.
- Stir in lemon juice and vanilla extract to enhance the flavor.
- Transfer the mixture to a saucepan over medium heat and cook, stirring occasionally, until it bubbles and thickens (about 5-10 minutes).
- Allow the cherry pie filling to cool completely before using it in your favorite desserts.
- Prep Time: 15 minutes
- Cook Time: 10 minutes
- Category: Dessert
- Method: Cooking
- Cuisine: American
Nutrition
- Serving Size: ½ cup (120g)
- Calories: 160
- Sugar: 33g
- Sodium: 5mg
- Fat: 0g
- Saturated Fat: 0g
- Unsaturated Fat: 0g
- Trans Fat: 0g
- Carbohydrates: 39g
- Fiber: 2g
- Protein: 1g
- Cholesterol: 0mg
Leave a Comment